LifeCycle®
LifeCycle
®
User Manual
6.3 History
The History screen contains records of past payments and income receipts. This screen helps users review what 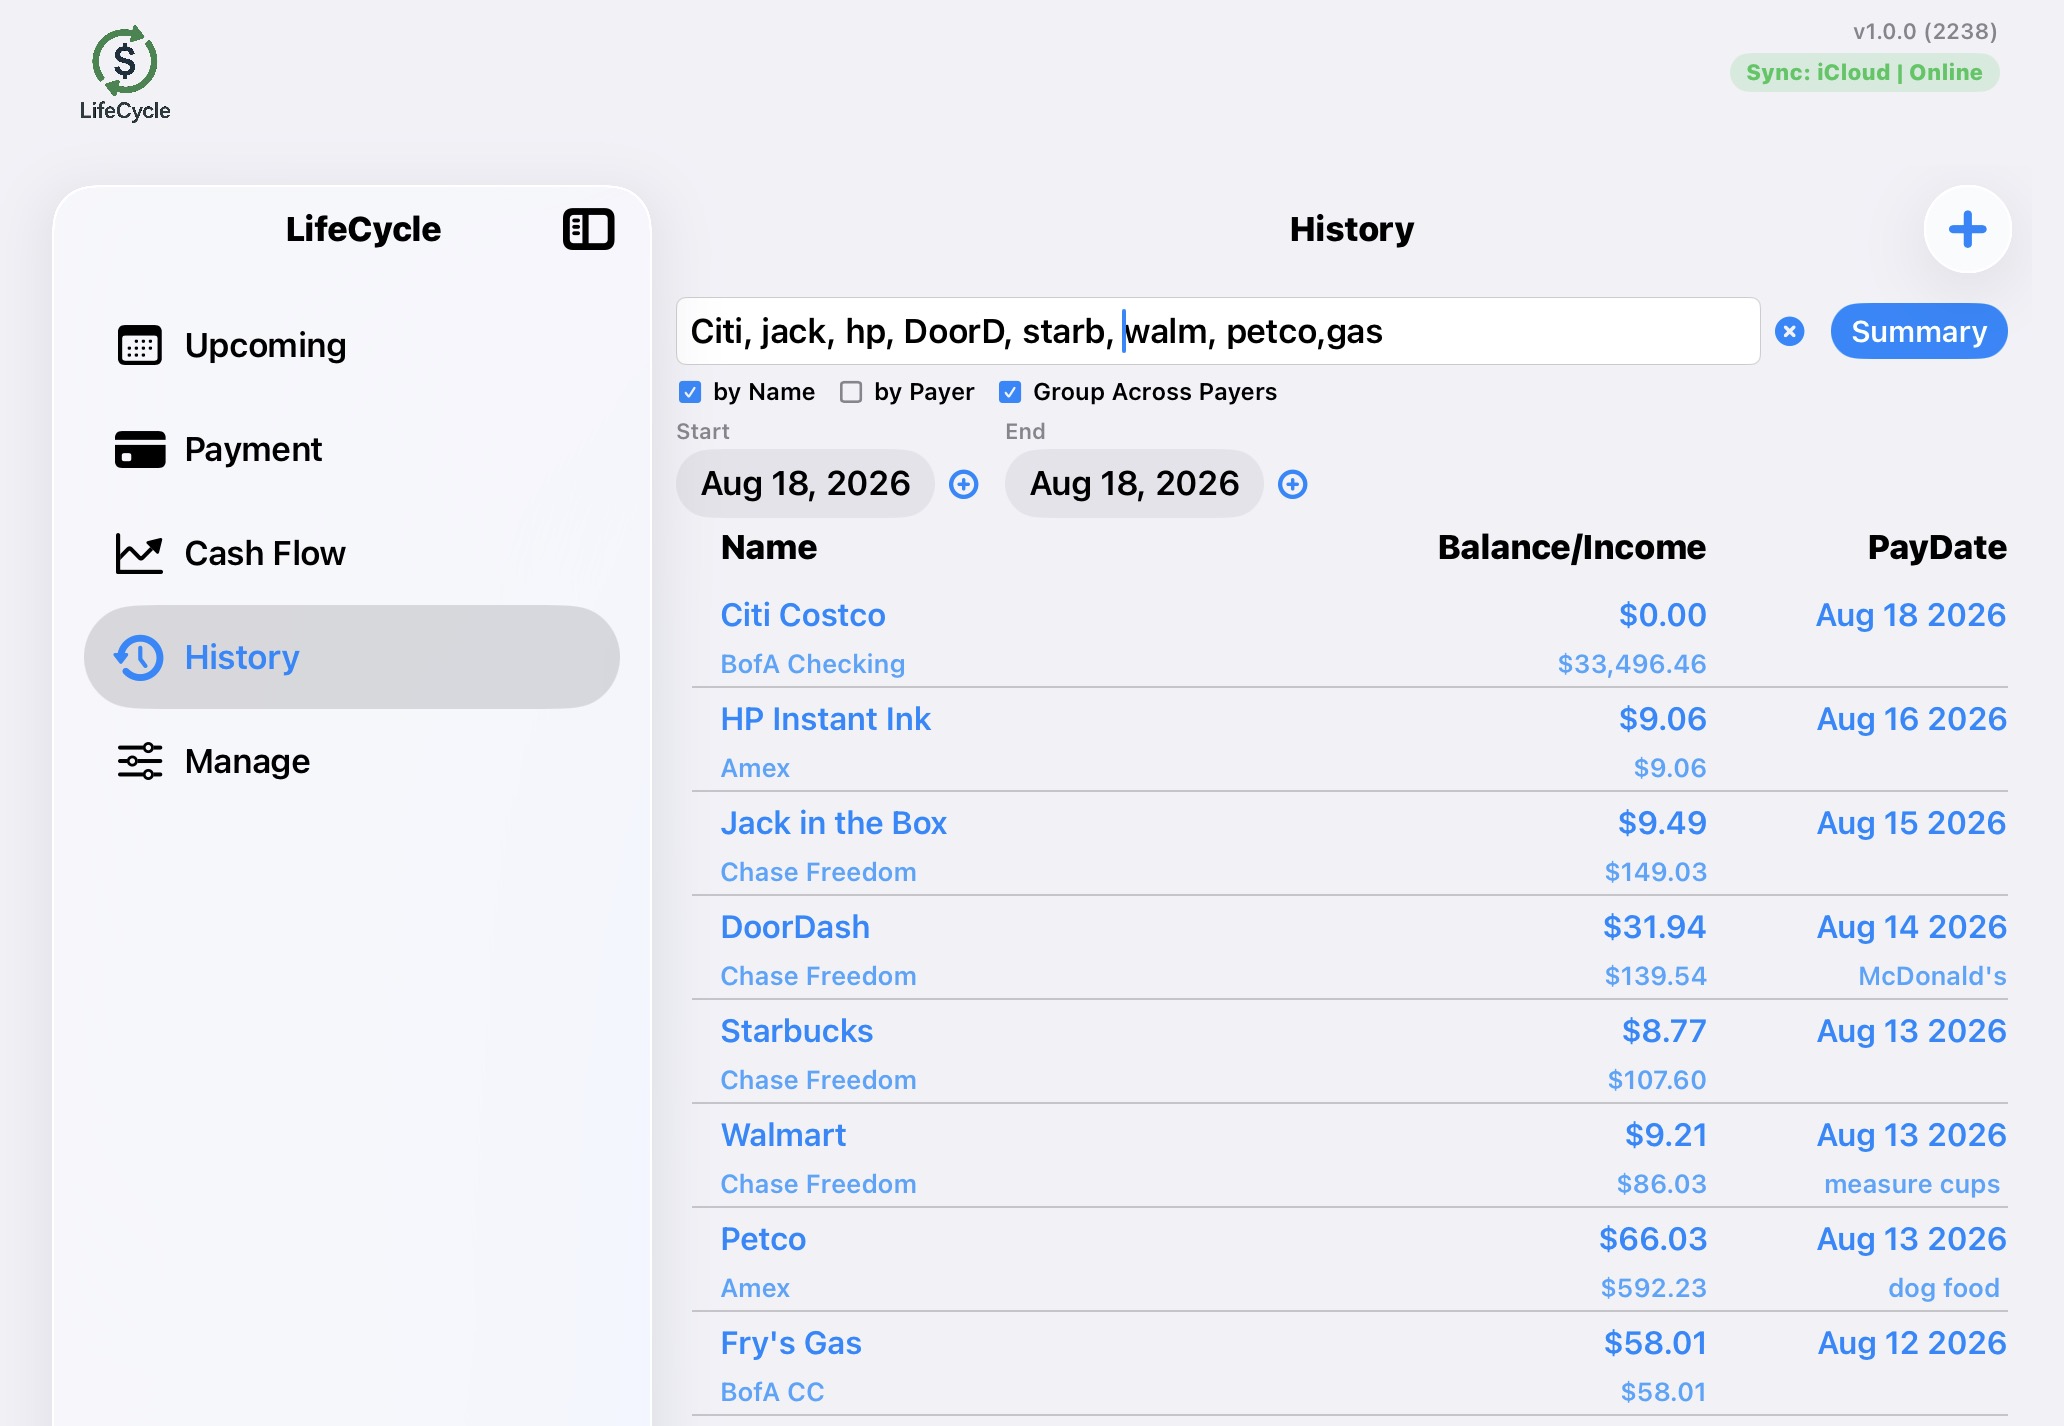 has already occurred and look back at financial activity over time.
- Displays past bill payments.
- Displays past income receipts.
- Allows users to summarize history by searching for a specific name.
As you can see in this image, the user recorded line item spending that occurred to DoorDash and Starbucks (he recorded it daily).
At the top he entered a search name, or in this case a number of search keys, and only those items in the History will show in the window. You can limit the History display to a date range, as well.
You can also enter a name (or more, separated by commas) and press the Summary button and get a summary of each of the items in History with aggregate totals. We’ll delve into that later in this document.
Full History
You can see the full history when you enter into the History screen. It will show the most recent transaction on the top and back through history going downward. Just scroll to see all the transactions.
Select Transactions
You can view selected transactions by typing in the names in the input area. The list will automatically match the input. The input matches the name in the transaction record. So if you enter, for instance, Chase, you will see all payments made to Chase -- not payments that you made with a Chase card.
Payments made with a card/account
If you wish to see all payments made with a specific card/account, enter that card/account into the input and tap the "by Payer" checkbox. (You could also uncheck "by Name" if you want to only see payments by this card/account.
Summary
Using the summary button, you can get a report of all payments for the items that you input. Whereas, if you enter multiple items, the History screen will show them all in one list, intermixed, the summary report will divide them into categories, so each item is listed in it's own table.
Summary "by Name" will list, divided, all of the items that you list and will show all payments made regarding that account.
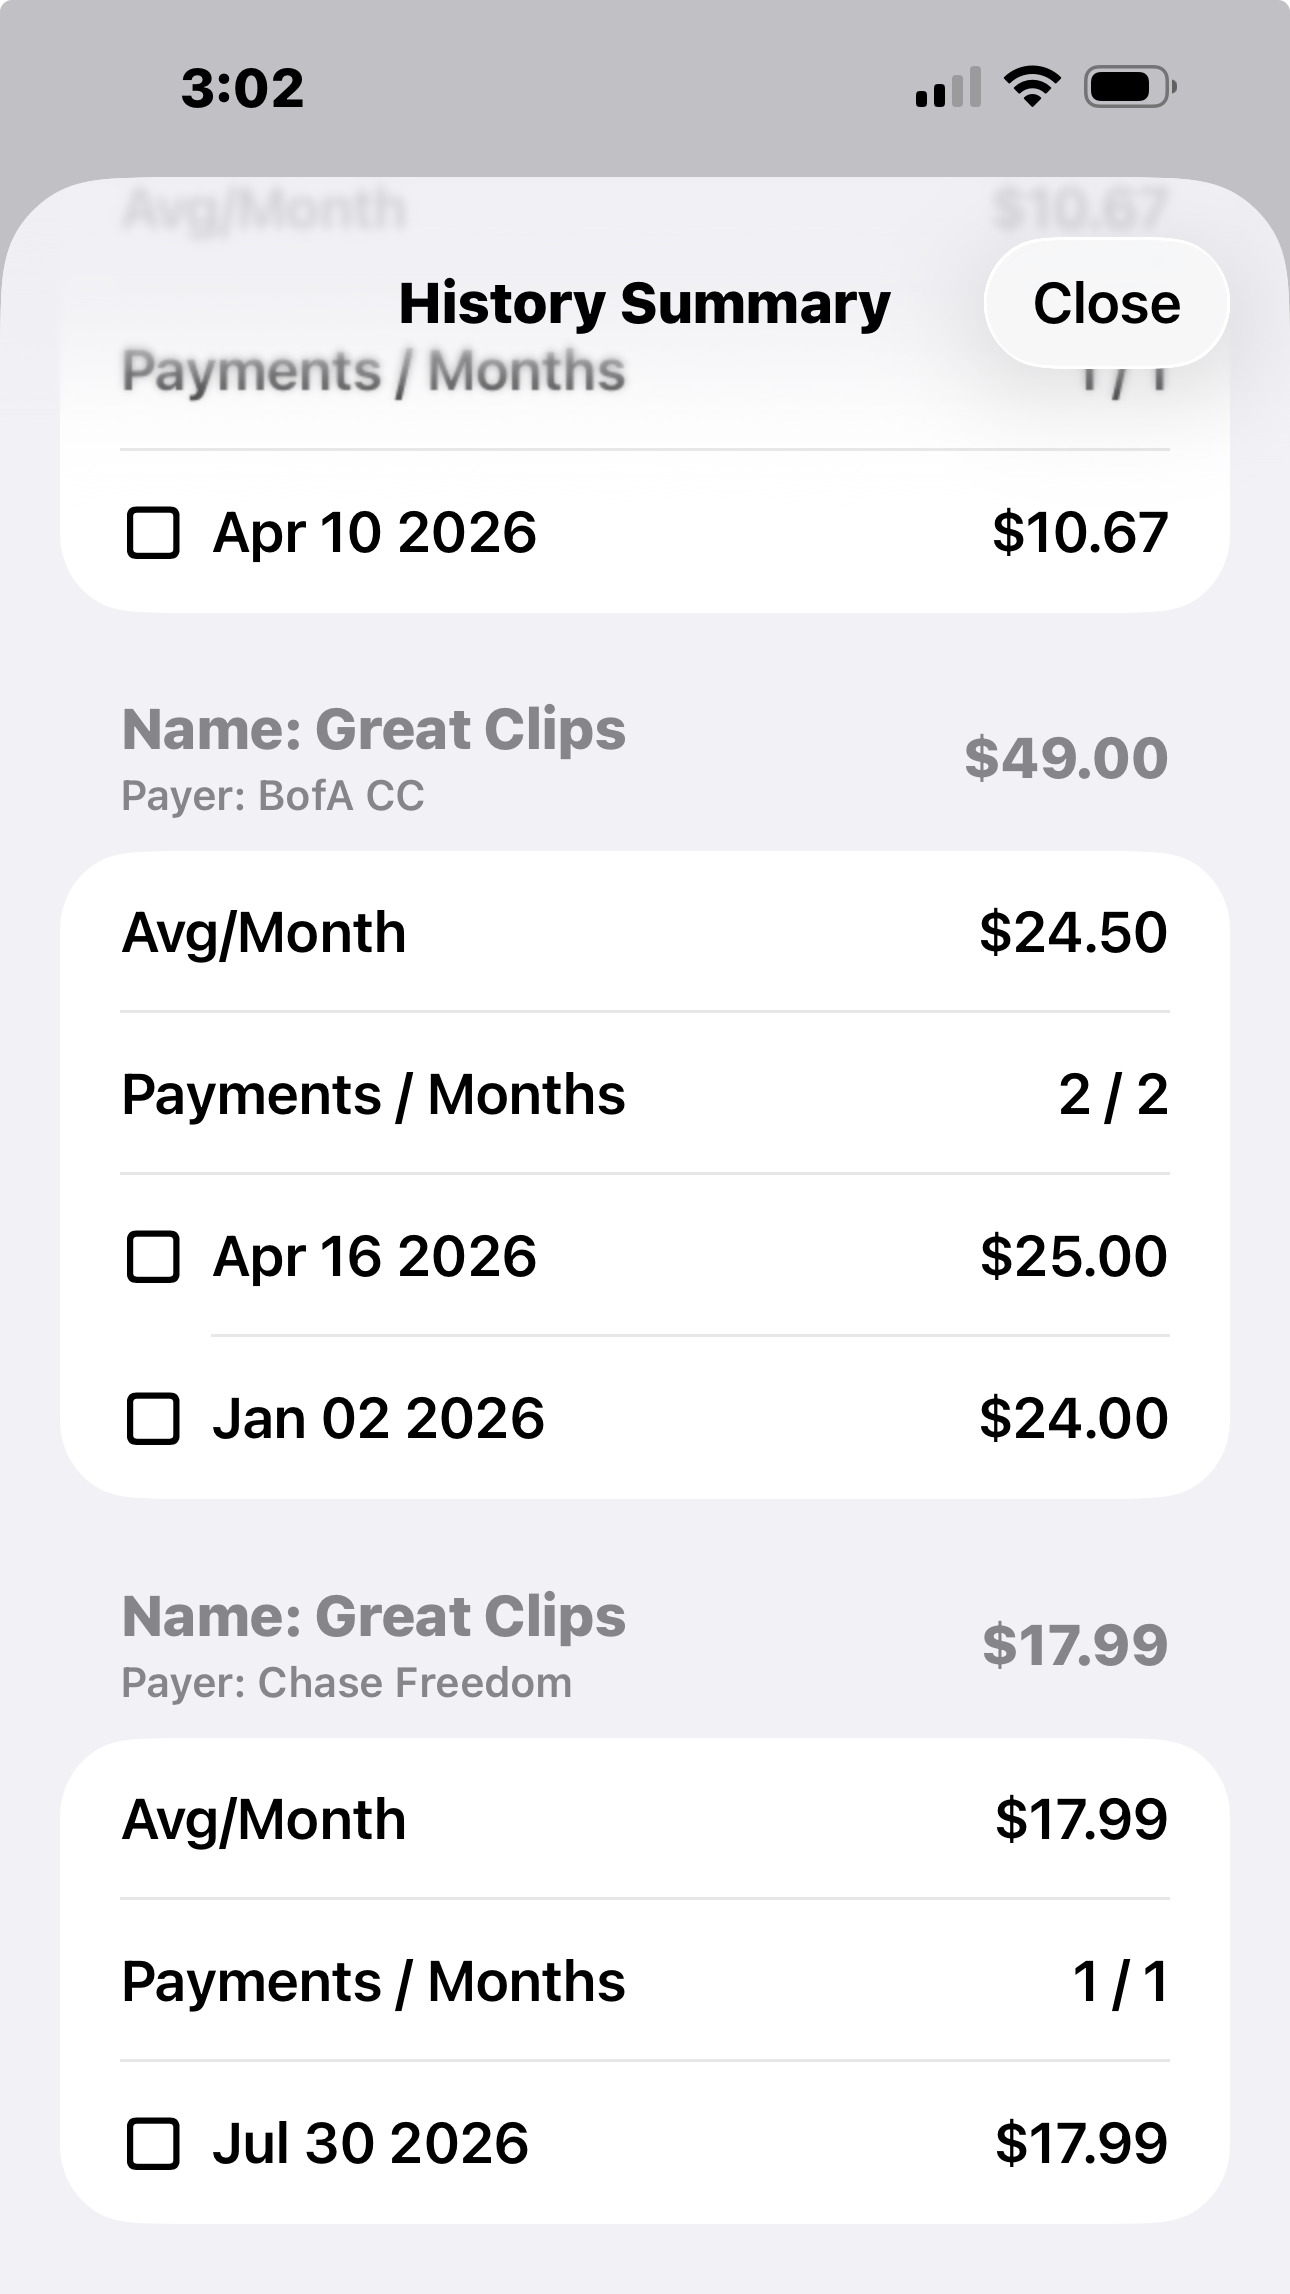
Summary "by Payer" will list, divided, all of the payers and the items they paid. Each payer in a separate table for ease of reading. You can see this in the image to the left the input line was "Chase, BofA CC". In the list, the user had gone to "Great Clips" multiple times, and paid using each of these cards on occassion. So Summary, by Name, by Payer, will produce this output.
On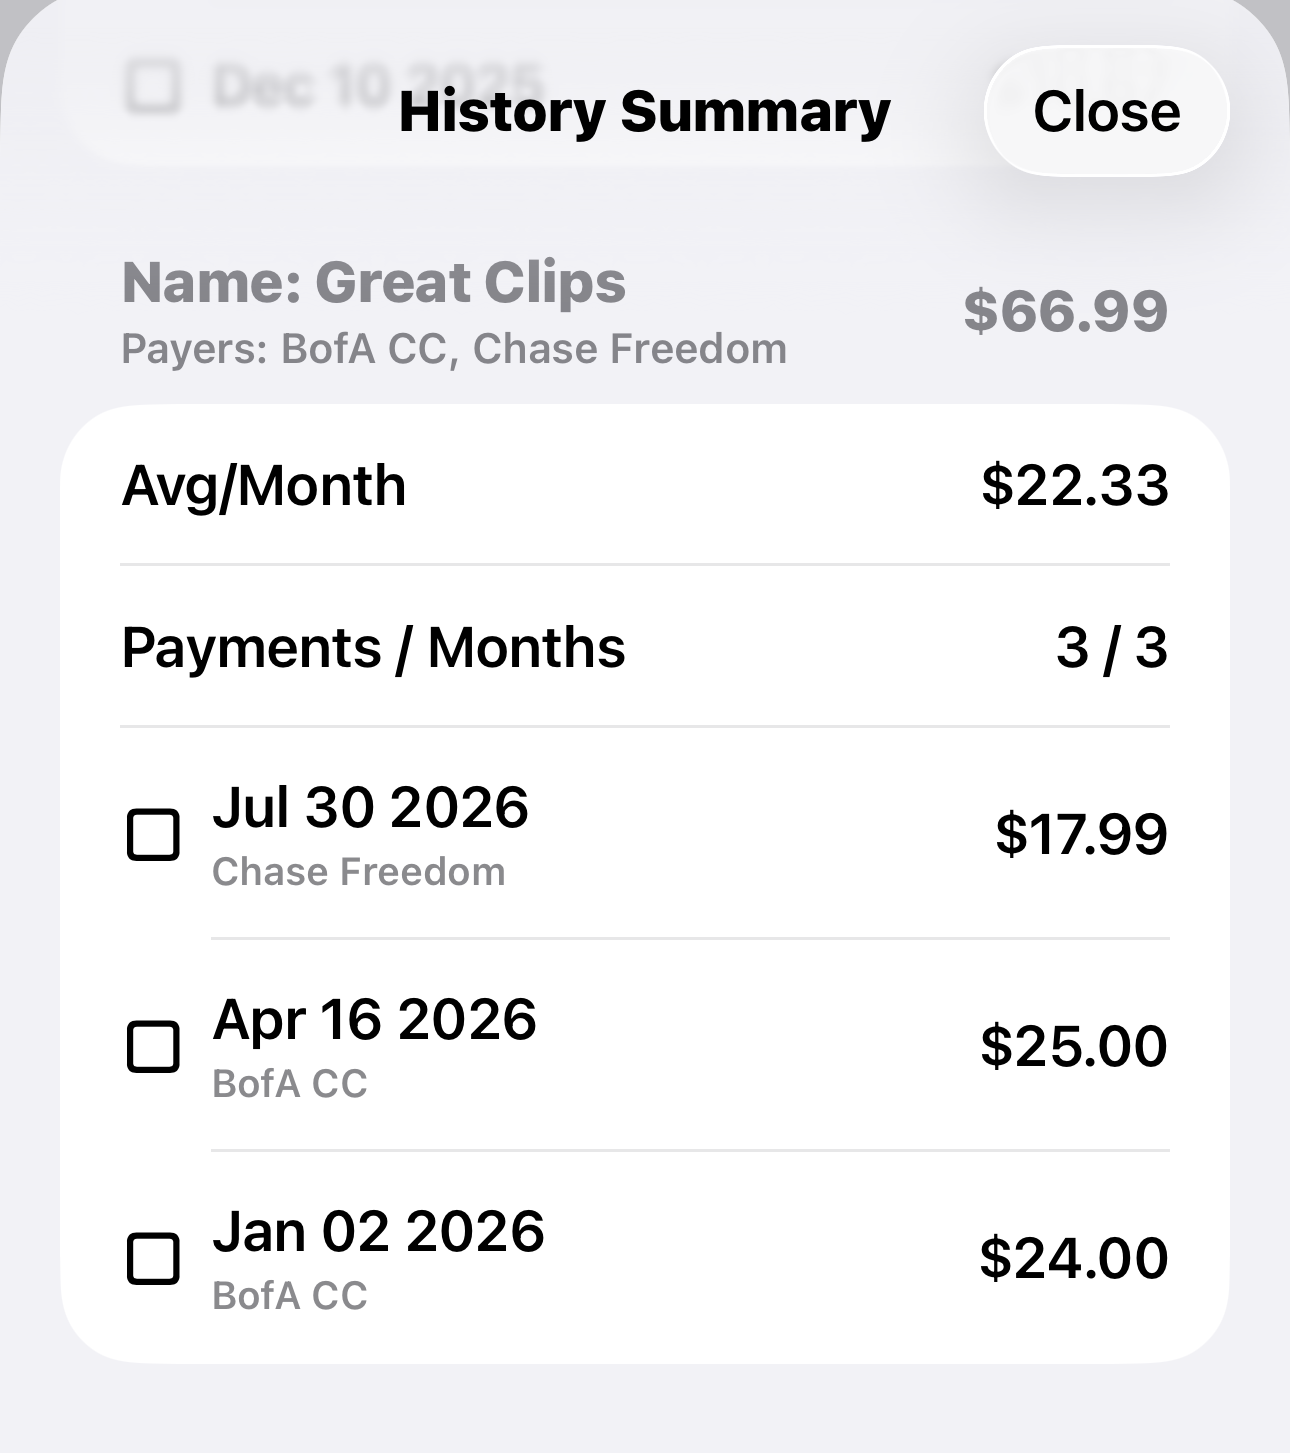 the other hand, Summary, by Name, by Payer, Group Across Payers will produce the output on the right, shown here. You can see how "Chase, BofACC" were combined into one group to show the payments made to Great Clips.
Either of these views will show the total paid to the bill for this group. It shows the average paid per month during this view; and it shows, looking at the image on the right for instance, that there were 3 payments made in 3 separate months (not necessarily consecutive).
For the purposes of examining the average cost per month in these views, you may tap the checkbox to the left of any given line item to exclude that item from the totals. In this way, any special/extreme payment that was made can be removed to see a clearer picture of likely actual spending.
As an example of this exclusion, you may use a card to buy simple staples around the house. You may spend $100 per month on such items. But then one month you purchase a computer on the same card for $800. That will, of course, skew your averages upward considerably. So if you exclude the computer purchase with the checkbox, you can still get a view of your normal spending on the card.
Clearing the input box
You can clear the input box with the small "X" to the right of the input.
Searching by Date
You may also search by date using the date pickers below the checkboxes. The starting date is on the left; the ending date is on the right.
If you mix that up:
1) if you only input an ending date (you can know you input a date because the "X" next to the date will light up), then the ending date will be honored as the last item shown on top.
2) if you only input a starting date, then the last item in the list will honor your starting date and the top will be the latest in the history.
3) if you input both starting and ending, it will honor both. But if you mix them up -- if the starting date is later than the ending date that you entered (both) -- then nothing will show.